General guidelines for specimen collection.
- SPUTUM
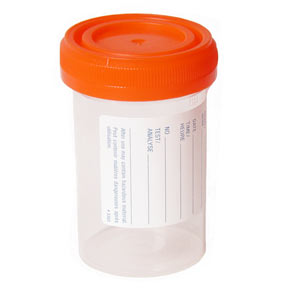
- URINE
- FAECES
- BLOOD
- BONE MARROW
- PUS
- WOUND
- TISSUE
- BODY FLUIDS
- BRONCHIAL / WASH / LAVAGE
- THORAT SWAB
- EAR
- EYE
MYCOLOGY
- Hair
- Nail
- Skin
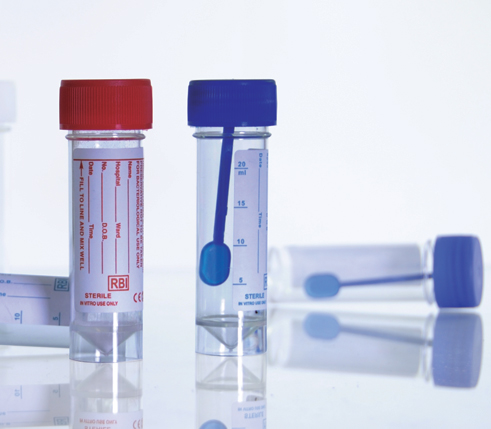
Specimen collectors used in Micro lab
 |
 |
 |
The proper collection of a specimen for culture is the most important step in the recovery of pathogenic organisms responsible for infectious disease. A poorly collected specimen may lead to failure in isolating the causative organism(s) and/or result in the recovery of contaminating organisms.
Basic Concepts for Specimen Collection
- Collect the specimen from the actual site of infection, avoiding contamination from adjacent tissues or secretions.
- Collect the specimen at optimal times (for example, early morning sputum for AFB culture).
- Collect a sufficient quantity of material. Use appropriate collection devices: sterile, leak-proof specimen containers. Use appropriate transport media Check expiration date before inoculating collection device.
- Whenever possible, collect specimens prior to administration of antimicrobial agents
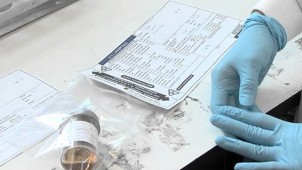
- Properly label the specimen and complete the test request form. The specific source of specimen is required. Example: wound, left leg.
- Minimize transport time. Maintain an appropriate environment between collection of specimens and delivery to the laboratory.
- If appropriate, decontaminate the skin surface. Use 70-95% alcohol (ALC) and 2% chlorhexidine or 1-2% tincture of iodine (TIO) to prepare the site. Allow a contact time of two minutes to maximize the antiseptic effect.

I.) Sputum
- Assure patient cooperation to get an adequate specimen.
- Instruct the patient as follows:
- Rinse mouth with clean water to remove food particles and debris.
- Have patient breathe deeply and cough several times to achieve a deep specimen.
- Patient should expectorate into dry, sterile container.
- Tuberculosis patients should expectorate sputum in the early morning, into a sterile container with lid sealed tightly.
- Transport immediately at ambient temperature. Refrigerate if a delay of more than one hour is anticipated.
- Expectorated sputum is acceptable for bacterial, mycobacterial, and fungal cultures. . Micro Lab will determine the number of squamous epithelial cells present for specimen adequacy and reject samples for bacterial culture that are not indicative of deeply expectorated specimens.
- Patients with clinical and chest x-ray findings compatible with TB should collect 3 first morning sputums (preferably on 3 separate days) for AFB culture.
Induced Sputum
- Sputum induction is a procedure to help a patient cough up secretions from the lungs more easily. The principle is to create extra moisture in the airways of the lungs. This will loosen and thin out secretions so they may be coughed up more easily.
The patient inhales nebulised hypertonic saline solution, which liquefies airway secretions, promotes coughing and allows expectoration of respiratory secretions.1 Sputum induction is simple and non-invasive, and if successful, often precludes the need for bronchoscopy.
The procedure produces coughing so it is likely that infectious droplets, if present, will be expelled into the room air. Strict airborne respiratory precautions should be observed whenever sputum induction is performed.
II.) Urine for Bacterial, Fungal, AFB Cultures
- Instructions for female patients to collect midstream urine for bacterial culture:
- Wash hands thoroughly with soap and water, rinse them, and dry them.
- Spread labia, with one hand, and keep them continuously apart.
- Wash the urinary opening and the surrounding area .
- Take the open sterile cup in the other hand without touching the rim or inner surface of the cup or lid.
- Void 20 to 25 ml into the toilet and catch a portion of the rest of the urine in the container without stopping the stream. Do not touch the legs, vulva, or clothing with the cup.
- Place the lid securely on the cup.
- Immediately transport to the lab, refrigerate in case of delay.
- Instructions for male patients to collect midstream urine for bacterial culture:
- Wash hands.
- Retract the foreskin completely.
- Wipe head of penis in a single motion with clean water. If not circumcised, hold foreskin back before cleansing.
- Void 20 to 25 ml into the toilet and catch a portion of the remaining urine in the cup without stopping the stream. Do not touch the cup with the penis.
- Place the lid on the cup securely
- Immediately transport to the lab, refrigerate in case of delay
- Indwelling catheter urine:
- Do not collect urine from the drainage bag because growth of bacteria outside the catheter may have occurred at this site.
- Clean the catheter with an alcohol pad.
- Use a sterile needle and syringe to puncture the tubing. Aspirate the urine directly from the tubing.
- Transfer the urine to a sterile specimen container Immediately transport to the lab, refrigerate in case of delay.
- Specimen handling:
- Label the container immediately.
For AFB CULTURE: Entire first morning Urine specimen should be collected, on minimum three Consecutive days, in specially provided sterile containers
III.) Stool, Faeces
- Collect specimen in a clean bed pan or use plastic wrap placed between the toilet seat and the bowl. Do not submit feces contaminated with urine or toilet water.
- Transfer specimen into a clean, dry container or the appropriate preservative.
- Transport at ambient temperature within two hours of collection.
IV.) Blood
COLLECTING BLOOD FOR CULTURING- POINT CARE PROTOCOL
Critical Considerations
 |
|
Physicians order the blood for culturing when the patient’s condition needs evaluate whether there is bacteraemia and septicemia. Many times in developing countries the specimens are collected without any of point care and aseptic precautions, Many blood cultures turn out to be either sterile when inappropriate specimen is inoculated and contaminated when careless in collection persists Circumstances in which blood cultures are especially important include known or suspected sepsis, meningitis, osteomyelitis, arthritis, endocarditis, peritonitis, pneumonia, and fever of unknown origin. Blood is one of the most important specimens received by the microbiology laboratory for culture, and culture of blood is the most sensitive method for detection of bacteraemia or fungemia. Issues related to types of bacteraemia, indications, and technique for blood cultures are reviewed here. The quality of the specimens submitted to the microbiology laboratory is critical for optimal specimen evaluation. In general, adult patients with bacteraemia are likely to have low quantities of bacteria in the blood, even in the setting of severe clinical symptoms. In addition, bacteraemia in adults is generally intermittent.
The first step in appropriate collection remains with optimal collection with ideal antiseptic precaution using the standard decontamination. If appropriate, decontaminate the skin surface. Use 70-95% alcohol and 2% chlorhexidine or 1-2% tincture of iodine (TIO) in the modern concept use Betadine to prepare the site. Allow a contact time of two minutes to maximize the antiseptic effect. For this reason, multiple blood cultures, each containing large volumes of blood, are required to detect bacteraemia. Prior to initiation of antimicrobial therapy, at least two sets of blood cultures taken from separate venipuncture sites should be obtained. The technique, number of cultures, and volume of blood are more important factors for detection of bacteraemia than timing of culture collection; these are discussed further in the following sections.
Technique — Careful technique is critical to avoid contamination of the blood culture media by normal skin flora during the process of collection. This is important because normal bacterial skin flora can also cause systemic disease, such as infective endocarditis, (eg Staphylococcus) and in some circumstances blood culture contamination can make it difficult to distinguish between false-positive results and true infection. Measures to reduce contamination include effective disinfection of the venipuncture site and avoiding blood culture collection through existing intravenous line, which certainly hampers the optimal decisions whether it is a contaminant or true pathogen.
Apply tourniquet to the extremity and identify the phlebotomy site.
Preferred: Use locally available chlorhexidine solution
- Cleanse and scrub the site with 2-3 alcohol swabs. Allow it to dry for at least 30 seconds.
- Wear sterile gloves.
- Use a firm scrubbing motion for 30 seconds to disinfect the site.
- A 10 cm area of the skin should be disinfected.
- Allow the site to dry at least 30 seconds before venipuncture.
Povidone-iodine swabs permit more decontamination than either chlorhexidine alone.
Allow to dry for a at least 30 seconds to allow antiseptic effect
- If using iodine product, clean patient's skin with alcohol to remove excess iodine (to prevent iodine burns).
- Use alcohol pad to cleanse the patient's skin, using a circular motion starting at the site and moving outward.
- Repeat times two.
- Allow to dry at least 30 seconds.
Do not touch the venipuncture site after skin preparation. If palpation is absolutely necessary, sterile gloves must be applied immediately prior to palpation.
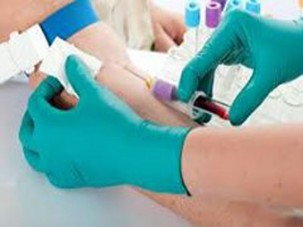
Insert needle into vein and withdraw appropriate amount of blood. Draw blood cultures prior to drawing other blood samples.
- Insert the needle into the vein
- Try to keep the dominant hand sterile.
- Remove the alcohol pad from the top of the culture bottles
- Inoculate each culture bottle with exactly 8-10 ml of blood, using previously marked indicator line. A lesser amount can be considered when talking the blood specimens from infants and younger children
- Remove the tourniquet and butterfly needle from the site and cover with gauze dressing. Apply pressure to site as needed.
10) If absolutely necessary to draw from a central catheter site, utilize the site that has been most recently inserted (unless ruling out catheter sepsis).
- Label the culture bottles with a label in the presence of the patient. Indicate the time that the specimen was obtained.
- Do not place label over bar-coded area of the bottle
- Fill out Microbiology-routine lab slip.
- Indicate suspected diagnosis, if necessary (required for rule out endocarditis).
- Include date and time of collection.
- Document that cultures were obtained on appropriate nursing form
Send specimens to the laboratory as soon as possible. Never refrigerate blood culture specimens. Send specimens directly to the Microbiology Lab.
Send second set of blood cultures using the same procedure as above. If a different peripheral site is possible, the second set may be drawn immediately. If using the same site, wait at least 10 minutes for the second set, and if possible (i.e. not waiting to give antibiotics) draw a third set 1-3 hours later.
In order to rule out specific diagnoses, more specific blood culture procedures may be necessary. See below for recommendations:
- Suspected catheter sepsis
- Draw two blood culture sets.
- One set is obtained from the suspected catheter.
- At the same time, a second set must be from a separate peripheral site.
- Time of collection should be noted for both specimens.
- If the catheter is removed, a section of about 1 inch in length from an intradermal portion is to be cut aseptically and sent to Microbiology Lab in a dry sterile container. Do not send catheter tip without sending concomitant blood cultures.
- Acute endocarditis
- Draw 2-3 culture sets from separate sites within 30 minutes of each other and before beginning antimicrobial therapy. Begin therapy after cultures are obtained.
- Subacute endocarditis
- Draw 2-3 blood culture sets on day 1, spaced 30-60 minutes apart. This may help to document a continuous bacteremia.
- If all are negative additional sets can be drawn on days 2 and 3 (no more than 4 sets in a 24 hour period).
- Immediate antibiotics are less important than establishing a specific microbial diagnosis.
- Fungal Cultures
- Candida spp. - If a physician orders fungal cultures, follow routine procedure for bacterial cultures as described above.
V.) Bone Marrow
- Physicians should wear gowns, masks, and gloves during specimen collection.
- Prepare skin as for blood cultures.
- Drape the surrounding skin with sterile linen.
- Aspirate the marrow percutaneously using a sterile needle and syringe.
- Transfer 3-5 ml for each:
- Bacterial test into a blood culture bottle - do not send in a Heparin tube.
- AFB culture and fungal culture into a mycobacteria/fungal blood culture bottle
Transport specimens immediately at ambient temperature.
VI.) Abscess (Pus)
- Decontaminate the surface with 70-95% alcohol and 1-2% tincture of iodine.
- Collect purulent material aseptically from an undrained abscess using a sterile needle and syringe. Open miliary abscesses with a sterile scalpel and collect the expressed material with a sterile needle and syringe.
- Transfer 5-10 ml of the aspirated material to sterile container. Transport immediately. Anaerobic transport media is not recommended for AFB culture. If requesting AFB culture, transfer at least 1 ml of the aspirated material into a sterile container.
- Swabs are a poor choice because they dry easily and because of the limited amount of material obtained. Swabs are not optimal for fungal, anaerobe cultures. Swabs are not accepted for mycobacterial cultures, perirectal abscesses, oral abscesses. Gram stains cannot be provided from a single swab. If a Gram stain is needed, collect two swabs.
Bullae, Cellulitis, Vesicles
- Cleanse the skin as for blood cultures.
- Aspirate the fluid/purulent material using a sterile needle and syringe.
- If an aspirate is obtained, place in appropriate bacterial transport tube or sterile container.
- If no material is obtained, unroof vesicle or bullous lesion and use a Dacron swab to collect cells from the base of the lesion. Place in appropriate bacterial transport media.
Cellulitis
Swabs and leading-edge aspirates with or without injection of saline fail to yield etiologic agents in the majority of cases. If an unusual organism is suspected, a leading-edge (advancing margin) punch biopsy is the recommended specimen of choice. Place biopsy in sterile container with small volume of non-bacteriostatic saline.
VII.) Wounds
- For closed wounds, refer to Abscess and Bullae, Cellulitis, Vesicles.
- For open wounds:
- Clean the sinus tract opening of the wound surface mechanically, without using a germicidal agent, to remove as much of the superficial flora as possible.
- Attempt to culture the base or edges of the wound to avoid collecting "normal flora" organisms.
- The following are preferred specimens for sinus tracts:
- Aspiration of material obtained by needle or catheterization.
- Curettings from the lining of the sinus tract.
- Swabs of the sinus tracts are acceptable only if the above cannot be obtained. Swabs of sinus tracts may not accurately reflect the underlying disease process.
- Do not submit cultures of superficial lesions for anaerobic culture. Biopsy of advancing margin of wound is the preferred specimen for anaerobes, mycobacteria and fungi.
VIII.) Tissue
- Tissue collection is an invasive procedure and requires surgery by a trained physician.
- Collect tissue aseptically. Include material from both the center and the edge of the lesion.
- Place the specimen in a sterile container on sterile gauze moistened with sterile nonbacteriostatic saline.
- Transport in less than an hour at ambient temperature, in a manner to ensure recovery of anaerobic organisms.
- Do not submit tissue in formalin.
- Do not jam the tissue into a Culturette using the swab; this is not an acceptable transport device.
IX.) Body Fluids, Sterile (except urine and cerebrospinal fluid)
- Prepare the skin as for blood cultures.
- Collect the fluid using a sterile needle and syringe.
- For aerobic and anaerobic organisms, submit 10 ml in a sterile container.
- If tuberculosis or fungal infections are suspected, collect a minimum of 10ml of fluid into a sterile container.
- Transport immediately.
- Do not send Sterile Body Fluids on swabs.
X.) Bronchial Brush/Wash/Lavage
- This technique should be performed by an experienced individual. Descriptions of the methodology are readily available in the literature.
- Transport in a sterile container immediately at ambient temperature.
XI.) Throat
- Use a cotton swab.
- Use a tongue blade and a good light source to ensure good visualization.
- Reach behind the uvula and swab:
- both tonsillar fauces, and
- the posterior pharynx, and
- any ulceration, exudate, lesion, or area of inflammation.
- Place the swab into the appropriate transport media and transport at ambient temperature.
XII.) Ear
- External ear cultures are processed as superficial wounds.
- Middle ear fluid will be processed as a miscellaneous body fluid. If the diagnosis is otitis media, the specimen of choice is middle ear fluid collected by tympanocentesis.
- Please indicate specific ear source.
XIII.) Eye
- Cleanse the skin around the eye with a mild antiseptic.
- Purulent conjunctivitis: Collect purulent material with a regular cotton swab.
- Place the swab into appropriate transport media and transport at ambient temperature.
- Corneal infections:
- Obtain Culture media from microbiology laboratory.
- Swab the conjunctiva as described above.
- Collect multiple corneal scrapings and inoculate directly onto bacterial agar media (chocolate agar, sheep blood agar, and BHI broth) and/or Saboroud’s dextrose agar media.
- Transport at ambient temperature
- Intraocular fluid:
- Collect fluid by surgical needle aspiration.
- Transport cultures at ambient temperature.
MYCOLOGY Cutaneous (Fungal only)
I.) Hair
- Scrape the scalp with a blunt scalpel.
- Place specimen in a dry sterile container.
- Transport at ambient temperature.
- The following specimens are also acceptable:
- Hair stubs
- Contents of plugged follicles
- Skin scales
- Hair plucked from the scalp with forceps
II.) Nails
- Cleanse the nail with 70-95% ALC.
- Remove the outermost layer by scraping with a scalpel.
- Place specimen in a dry, sterile container.
- Transport at ambient temperature.
- The following specimens are also acceptable:
- Clippings from any discolored or brittle parts of nail
- Deeper scrapings and debris under the edges of the nail
III.) Skin
- Cleanse the skin with 70-95% ALC.
- Collect epidermal scales with a scalpel, at the active border of the lesion.
- Place specimen in a dry sterile container. Do not tape specimen to slide.
- Transport at ambient temperature.